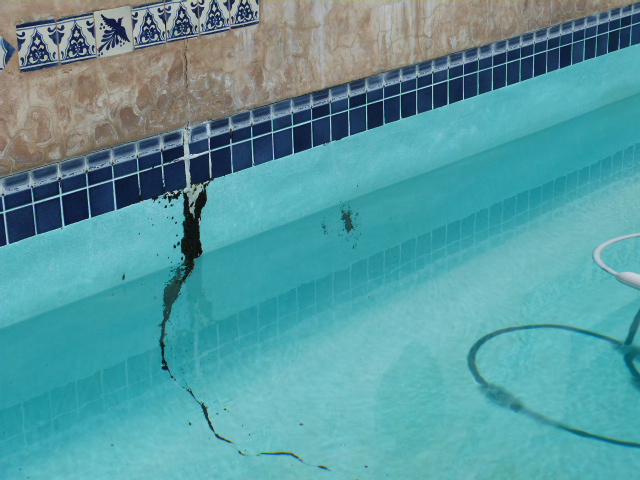
We've been planning this pool upgrade for three years when we first noticed the beginning of a crack down the side. Well, this is the SUMMER OF THE POOL, and it has been quite an ordeal. There were basically four phases to this re-mo. 1. Redo the lighting in and around the pool and on the deck, including tree lights that had failed because the tree bark grew around them(!). 2. Empty out and refurbish the raised planter beds. 3. Restucco the outside walls of the pool and all the planters. This time we used an acrylic stucco that, allegedly, won't crack and discolor. And finally, 4; refinish the pool in fiberglass, which also won't crack and discolor and grow slimy stuff. So far, we've completed 1, 2, and 3. The fiberglassing will happen mid-October when we return from our trip.
To refresh your collective memories, here is a picture of the pool taken some years ago before the crack appeared and before the original stucco began to discolor badly. (Alfonso swears this will not happen with the new covering!)
By the time we got around to doing the repairs things were looking quite seedy and unkempt. The soil in the planters was pretty well depleted so not much was growing well.
Jorge arrived with his crew of delightful Chilean guys and made short work of the plants and shrubs, repaired the wall lights, installed new up- and down-lights in the Birch trees and checked out the watering system for the new plantings (after fiberglass). He installed all LED lighting which is hideously expensive but will last until Em and Andrew's children retire.
Next up was the aforementioned Alfonso, the stucco expert. The first thing he did was to power wash all the concrete part of the patio and all the stucco around the sides, especially under the pool cap. Here's how it looked afterwards.
Except for all the cracks that needed to be fixed, it looked pretty good. But alas there were many spots that needed to be re-cemented before the stucco could be applied.
 |
Through the 50' hose, up over a trash barrel to hold it steady, out through a cleverly rigged flexible tube and into the main water drain on our property. Took about 5 hours from start to finish. When the water was all out it really showed the extent of the crack and whatever it is that is growing around it. Disgusting!
At the end of the day, here's my lovely pool sitting empty and forlorn, awaiting a facelift that will being it back to its former glory!
So that's what has been preoccupying me for the last two months. In case you wondered . . .


2 comments:
Oh, you poor thing ~ these are HUGE projects and I do not envy you for one moment. But, no choice so good for you for getting them done before your trip. It is a lovey pool...
Soon all this fuss will be just an unpleasant memory, and you'll be enjoying your beautiful pool.
Post a Comment